
Hanging photo wallpaper: how to get it right
However, hanging photo wallpaper is particularly challenging. Here are a few tips to help you get it right.
The special challenges of hanging photo wallpaper
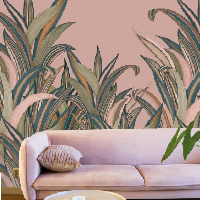
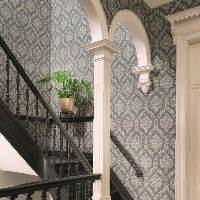
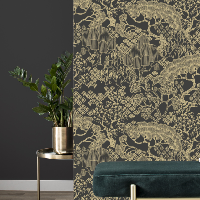
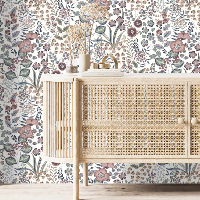
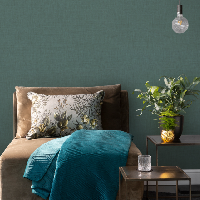
Photo wallpaper is a real eye-catcher. It allows you to bring impressive designs to your four walls. Photo wallpaper is usually supplied as a kit with a predefined layout. The strips are numbered by the manufacturer in the order in which they should be hung on the wall. To ensure that the pattern matches your expectations, it is important to work precisely when hanging the wallpaper. Denn das fortlaufende Muster erfordert Präzision.

Differences between photo wallpapers
There are different materials for photo wallpapers. Patterned wallpapers can be made of paper, non-woven fabric or vinyl. The material affects how the photo wallpaper should be hung and what equipment you need. For paper wallpapers, for example, you need a pasting table on which you can coat the wallpaper with glue. For non-woven and vinyl wallpapers, the glue is applied directly to the wall.
Hanging photo wallpaper: Preparations
It is particularly important to prepare the surface, i.e. the wall, thoroughly before hanging fine photo wallpaper. The wall must be clean, dry, and free of dust. Holes, cracks, and uneven areas must be filled and sanded. In addition, the floor must be protected with a protective sheet to prevent glue stains.
It is best to remove old wallpaper before hanging photo wallpaper. Otherwise, the moisture in the adhesive may cause the old and new wallpaper to peel off the wall. Even if you are using self-adhesive photo wallpaper, we recommend removing the old wallpaper first so that nothing shows through. Although this preparatory work takes time and patience, it guarantees a much better end result.
Tip: how to remove old wallpaper
Removing old wallpaper can be more or less tedious, depending on how it was applied and how well it adheres. In some cases, the wallpaper can be easily removed when dry. If this is not possible, tools and accessories are required. It is important to completely remove all wallpaper residue and achieve a smooth surface before applying new wallpaper.
For thin wallpapers, a mixture of warm water and dishwashing liquid or a special wallpaper remover is often sufficient to soften the residue. It can then usually be removed without difficulty. Stubborn residue can be scraped off with a spatula. In the case of split wallpaper, two steps are sometimes necessary, as the backing does not always come off immediately.
For thicker, waterproof wallpaper, it may be necessary to perforate the surface before wetting it. To do this, use a spiked roller, also known as a nail roller or hedgehog roller. The small holes allow moisture to penetrate better, which then makes it easier to remove the wallpaper.
Hanging photo wallpaper: adjusting the sheets and strips
What if the photo wallpaper pattern does not exactly match the size of the wall? This is usually not a problem. If the wallpaper is delivered in sheets, it is usually smaller than the wall. Draw lines in the center of the wall to determine the position of the pattern. A spirit level and a pencil are essential tools for determining the correct position.
If the photo wallpaper is larger than the wall, it can also be adjusted. Here, too, use guide lines to ensure that the center of the image is in the middle of the wall and start wallpapering in the middle of the wall. Any excess at the edges can then be removed with a utility knife.
If you want to hang photo wallpaper on a wall with windows and doors, you need to plan even more carefully so that the pattern is shown to its best advantage. A sketch or digital visualization will help you arrange the pattern correctly.
Materials needed for hanging photo wallpaper
Here are the tools and materials you will need to hang photo wallpaper:
- Wallpaper paste
- Paste brush
- Wallpaper brush
- Joint roller or pressure roller
- Sponge
- Cutter or wallpaper scissors
- Spatula and filler
- Ladder
- Spirit level
- Tape measure
- Pencil
Photo wallpaper: how to hang it?
To hang photo wallpaper, follow these steps:
Instructions for roll wallpaper
- Lay the strips out on the floor in the correct order.
- Start by mixing the wallpaper paste in a bucket.
- Set up the pasting table and lay the first sheet or strip on it.
- Coat the strip with paste and allow to soak in according to the manufacturer's instructions. As a rule, it is recommended to wait 3 to 10 minutes.
- Draw guide lines and stick the wallpaper strip to the wall. Depending on the type of photo wallpaper, the strips should be stuck overlapping or edge to edge.
- Once the wallpaper has been unrolled, it should be pressed down with a roller, starting from the middle of the strip.
- Any glue that has been squeezed out during smoothing can be easily removed with a slightly damp sponge.
Instructions for non-woven or vinyl wallpaper
- The strips should be laid out in the correct order on the floor.
- Mix the adhesive for non-woven or vinyl wallpaper in a bucket.
- Apply the adhesive directly to the part of the wall to be covered. Use a glue roller for this.
- You can now hang the strips on the pasted wall using the markings as a guide. If the wallpaper slips, it can usually be repositioned slightly. Non-woven wallpaper can be moved slightly.
- Press the wallpaper into place with a pressure roller. Air bubbles can be removed by rolling them outwards.
- If glue spills over the edges, you can remove it with a slightly damp sponge.
- Apply the next strip in the same way. For non-woven wallpapers, it is common to glue the edges together.
Tip: work in pairs
It is a good idea to work in pairs when hanging photo wallpaper. This way, one person can hold the wallpaper and ensure it is aligned, while the other smoothes it with a roller.
Note: take the room temperature into account
It should not be too cold when hanging the wallpaper so that the adhesive can dry properly. A room temperature of 68 degrees Fahrenheit is ideal. Also avoid drafts, as these can cause the adhesive to dry unevenly. The wallpaper could tear or peel off.